December proved to be another amazing month of creative activity for Beye Discovery students! We began with textile arts, an art form that Nina, Jenny and I continue to work with in our own artmaking endeavors. Our Monday students learned basic weaving techniques with paper followed by a more organic weaving activity with fabric strips to create abstracted snowflakes. Our Tuesday students learned how to create faux batiks; Wednesday students created printing blocks with foam and cardboard and made prints on cotton fabric; and Thursday students created fabric collages. That was just week 1! Please continue to scroll down to discover more of what we accomplished as 2011 came to a close.
Here are some photos of the first stage of the batik process: we drew designs with washable glue on muslin fabric to create a resist (rather than the traditional wax). Once the glue dried, students used a rainbow of tempera paints to add color to the design (rather than the traditional dye). After the paint dried, the glue was washed away, revealing the neutral colored lines of the fabric beneath. These textiles are brilliantly colored and on display just around the corner from the office on the west wall. Do take a look when we return from vacation, if you have yet to see these beautiful textiles in their finished state!
 |
| Sam's bumblebee |
 |
| Brody's dragon |
 |
| Hayden's dinosaurs |
 |
| Sydney's holiday theme |
 |
| Leila's snowflakes |
 |
| Alexa's snowflake |
 |
| completed snowflake design |
 |
| completed snowflake design |
The photos below show the students at work on their fabric collages. Before they began, Jenny demonstrated how visual weight can impact a design and explained how to create a focal point with shape placement, size and color. These are important concepts to teach and to put into practice, as an unbalanced design can negatively impact the success of the final image. Students began by sketching out ideas and then chose their best design to create in fabric. As a side note, it was great to see how eager the students were to identify their focal point and to create a balanced design!
 |
| Ben cutting out fabric shapes |
 |
| Norah's completed design |
 |
| Porter adding glue, with help from Sydney |
 |
| Dexter at work |
 |
| A completed design |
 |
| Emily's heart shapes |
 |
| Olivia at work |
 |
| Max's completed fabric collage |
During the second week of December, students were introduced to toy and game design. There is a wonderful book titled "Toys - Amazing Stories Behind Some Great Inventions" by Don Wulffson that provides the history of how some of our most popular toys and games came to be. For example, "Slinky' was originally invented to help stabilize the navigational instruments in ships, although it was unsuccessful for this purpose. "Parcheesi" was invented when an Indian weaver noted that the pattern in a woven textile could be turned into a game. "Legos" were originally made of wood and the inventor, a carpenter by trade, immediately realized that their production would be faster and cheaper with plastic.
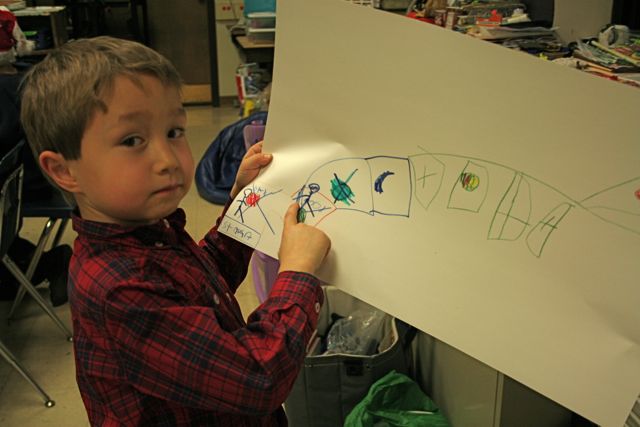
We began our toy/game week with board games, moved on to action figures/characters and then soft toys. The game boards were such a big hit that most of the children wanted to take them home to play with as soon as they were complete! You'll see why when you look at the photos below.
 |
| Dexter creating his game board |
 |
| Joseph ready to play his game |
 |
| So close Joseph!!! |
 |
| Emerson |
 |
| Aidan |
 |
| Daysha, Leila and Jessica |
 |
Daysha listing the rules to her game
|
 |
| Rules for Daysha's game |
 |
| Daysha's playing pieces |
 |
| Emerson with playing cards for his game |
 |
| Aidan |
 |
| Joseph's second game board, in progress |
|
|
|
|
 |
| Cyrus working on his baseball game |
 |
| Joseph, demonstrating how to play his game |
 |
| Joseph with Dexter, learning to play Dexter's game |
 |
| Jessica |
 |
| Sam's basketball game board |
The Tuesday class created action figures and characters that were especially imaginative and show the students' growing skills with 3-D forms! Jocelyne revealed that the first pop-culture action figure was G.I. Joe. For inspiration, we presented a variety of contemporary action figures. Using these as exemplars, we asked students to explain why the action figure was so named. They quickly responded that action figures have moveable parts! While creating moveable parts was an option using modeling compound (because it doesn't harden) over wire (to allow the figure to bend), the children preferred to work with model magic and clay (which do dry hard), so these really turned out to be characters rather than action figures. Our challenge to the students was that their action figure or character should be able to stand or support itself. We really enjoyed watching their characters evolve into their finished states!!! I regret that I didn't write down the character's names to share with you here. If possible, when we return to school, I will collect the information and update the post.
 |
| Emerson |
 |
| Emerson's character up close! |
 |
| Dexter |
 |
| Dexter's character up close! |
 |
| Sam |
 |
| Govanni's character |
 |
| Joel with characters |
 |
| Brody and his dragon character |
 |
| Govanni and characters |
 |
| Norah's character |
 |
| Daysha with character and ziggurat-like form |
 |
| Norah with owl character |
 |
| Norah's owl character up close! |
 |
| Nicole's tiger character |
 |
| A fun class photo taken by Govanni! Silly faces mandatory!!! |
|
|
To create soft toys with our Thursday students, we used recycled felt (made from drinking bottles), polyester fleece and tapestry needles (blunt point, so no painful needle pricks and larger openings to thread the needle). Student designs included a penguin, a few racoons (a favorite character from a needlepoint book Jocelyne brought for inspiration), and simple shapes. Just in case you were wondering, the boys were equally, if not more excited by this project, than the girls! Students first sketched their designs on paper and then used the sketch as a pattern to cut out the fabric pieces to make their toy. For the younger students who wanted to sew rather than use glue, we had them complete a lacing card, to make sure they understood that the needle must enter the same side it had been pulled from (at least for the running stitch that we introduced). Despite some challenges with needle threading and knotting, this first venture into soft toy design was quite fun! I wish we had taken photos that day but needles to say, (pun intended) were we pretty busy helping with threading and knotting.
 |
| Ben with his soft toy |
Below is a photo of our soft toy game made with the Friday students. Jocelyne pre-sewed fabric squares together and asked students to consider how these squares could be made into a game. We also considered designs that could be applied to the front and back of the square that would allow for multiple options of game play. Here are all the excellent ideas students came up with to play with this game: cards, beanbag toss, heads and tails, dodgeball tag, monkey in the middle, dice, face, ball in the hole, bowling, catch, hide and seek, 500 and basketball.
 |
| Soft toy squares for multiple game play |
For our final projects of 2011 and to promote the idea of giving and true holiday spirit, the students spent almost 2 weeks making a variety of items to give as gifts for family and friends. They created ornaments made from clay and model magic; decorated picture frames; made paintings on canvas and produced other 2-D works on paper. To gift wrap their handmade items, students decorated re-purposed paper with stamps of snowflakes, penguins, snowmen, etc. One of our older students suggested a Secret Santa activity, and based upon the huge show of support for the idea from all of the students, we worked with enthusiasm to make these gifts as well!
 |
| Emerson |
 |
| Suzanne |
 |
| Sam |
 |
| group collaboration |
 |
| Govanni |
 |
| Alexa |
 |
| Daysha and Govanni at work |
 |
Govanni
 |
| Ben's picture frame, in progress |
 |
Ben's completed picture frame
 |
| Sydney's picture frame, in progress |
|
|
 |
| Sydney's picture frame, complete | | |
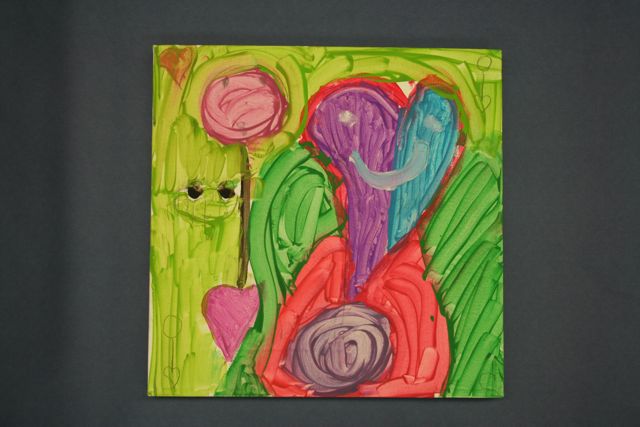
2-D Art: Paintings, Scratch Art & Crackle Paint Effect over Crayon Drawings
 |
Daysha and Sydney, winter themed paintings
 |
| Max's abstract painting |
 |
Daysha's abstract painting
 |
| Daysha's completed abstract painting |
 |
Brody's "B" rocket painting
 |
| Max's abstract painting |
|
|
|
 |
Emerson's scratch art, part 1, color with crayon
 |
| Emerson's scratch art. part 2, covering color with black crayon |
|
 |
| Ben's scratch art, part 3, scratching on black surface to reveal colors beneath |
 |
| Ben's completed scratch art with tornado |
 |
| Sam's scratch art, part 1, color with crayons |
 |
| Hayden's scratch art |
 |
| Detail of Hayden's scratch art |
 |
| Norah's scratch art, vase with flowers |
 |
| Aliens!!! |
 |
| Brody's scratch art with rocket |
 |
| Porter's scratch art, abstract |
 |
| Joseph, crackle paint effect over crayon |
 |
| Daysha, crackle paint effect over crayon |
 |
| Dexter, crackle paint effect over crayon |
 |
| Brody, crackle paint effect over crayon |
 |
| Sam, crackle paint effect over crayon | | | | | | | | | | | | |
1. They enjoyed the process of making something special for someone else
2. They took pride in their work (craftsmanship was important to them)
3. Giving makes them feel good
What a super group of children!!!
Please see the next post for photos of the children exchanging their gifts. In a word, "precious"! What a terrific way to begin the holiday and to bring 2011 to a close!!! Thank you to all!


No comments:
Post a Comment