Friday, August 30, 2013

Preserving Designs From Nature

Post Contributed by Jocelyne Adkins, Program Director

We had hoped to embark on a nature walk today, however the temperature was quite hot so we decided to stay indoors. Earlier today, I had collected leaves, sticks and fallen blossoms, so we gave these to the students to work with this afternoon.


Leila

We began with balls of white model magic that we flattened with the palms of our hands. Then, the children made impressions into the "dough" with the leaves, sticks and blossoms. There is something very satisfying about preserving shapes and designs from nature, before they become part of the life cycle once more, through the process of decay, becoming nutrients for the soil, and eventually new growth.

Joey

Students could also leave their leaf or blossom in the model magic to dry. We expect that a coating of glue or modge podge will allow the organic matter to remain whole and suitable for display... time will tell, however we are hopeful : )


Elizabeth

Emory

Leila

Following our nature activity, students had the choice to make additional designs in glue (see Tuesday, August 27th) and to create with model magic.


Anika

Nana Yaa and Elizabeth

Anika

Anika

Joey

Nana Yaa

Elizabeth

We had a truly wonderful week in Beye Discovery and we look forward to the days and weeks ahead. We thank our students for all their enthusiasm and for making this week special : )

Thursday, August 29, 2013

Design and Abstraction with Outdoor Paint

Post Contributed by Jocelyne Adkins, Program Director

Today involved some experimentation: In the past, we've made our own outdoor paint using powdered milk, water and food coloring. Lately, we came across some additional recipes, and we chose one using cornstarch and another using flour. So today, each group made a different paint recipe, to test which was the best. For the most part, we used 1 cup dry to 1 cup water and food coloring (to your preference: the more you add, the dark/brighter the color).


Elizabeth, Elise and Jessica

In the end, all the recipes had merit, however the most economical is the recipe with flour. Powdered milk has a definite odor and cornstarch settles more easily and needs to be stirred often. No matter the recipe, our students used all the paint and were completely engaged in the process. It was a win-win all around, and the entrance to door 7S never looked better, with colorful abstractions of dripping and spattered paint, trailing vines, geometric designs and a cat! Do take a peek below...


Dexter


Joseph with "bleeding" paint colors


Jadon

Norah


Lucy

Dexter

Joey


Emily

The completed work

Detail, with leaf : )

Wednesday, August 28, 2013

Bubble Art!

Post Contributed by Jocelyne Adkins, Program Director

Who doesn't love to watch a bubble spring to life ~ a perfect sphere reflecting light, rising beautifully into the air and floating so freely? However, bubbles eventually pop, and we decided to capture this moment of the bubble and to make some bubble art.


A bubble takes flight (lower third of photo)

Our bubble solution was made over the weekend with dishwashing detergent, water, glycerin and food dye.  Homemade bubble solutions work best when they have had 24 hours or  more to "sit" before using them.

Joseph
 
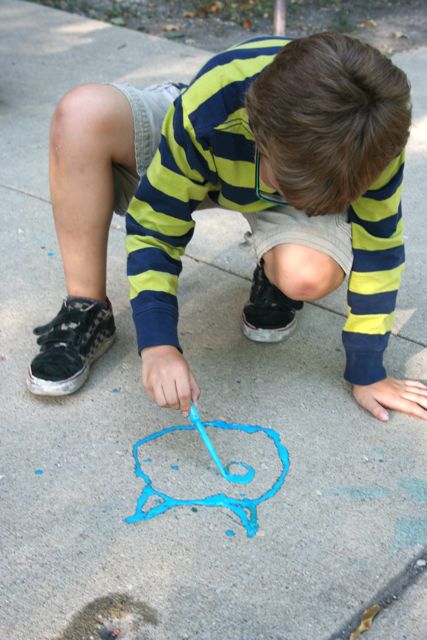
Students began the activity by making their own bubble wands with colorful plastic coated wire: we challenged them to create a shape other than a circle or sphere. Then, we went outside with watercolor paper and our dyed bubble solution. The pictures below tell the rest of the story. This was so much fun: if you are looking for a great activity for your next block party, this may be it!


Emory

Elijah

Carson

Lucy

Jackson

Ben

Joey and Jessica

Elise

Jackson

Jessica


Ginger

Leila


Joseph

Dexter

Anika

Lucy

Heidi

Anika

Emory

Heidi (the shape above was made using the wand with bubble solution as a stamp)

Heidi "stamping" with wand and dyed bubble solution

Carson with Joey, using the scooter to create arcs through the bubble art

Jessica

Joey's bubble art with scooter arcs

Ginger with bubble art and scooter arcs

Carson's foot

Jessica

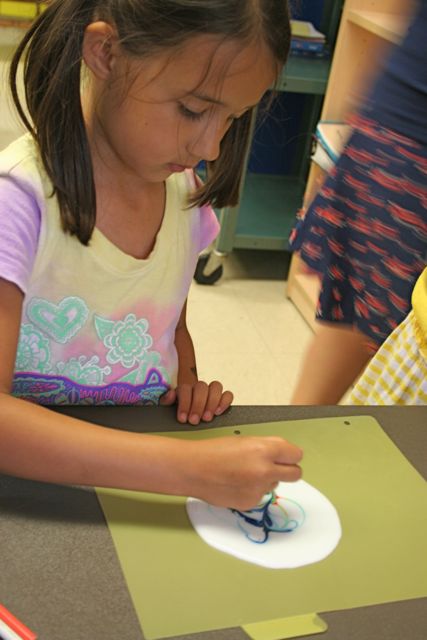
An added note: Before we created our wands and went outside to make our bubble art, we first conducted a little experiment to show that water molecules like to stick together (see photo below). Even when poked with a toothpick, the water molecules held their ground and their surface tension kept the water droplets intact.


water droplets to demonstrate surface tension

However, a tooth pick dipped in soap will separate water molecules and decrease surface tension, causing the water droplet to "spill out" from its "skin" created by the surface tension. 


a tooth pick dipped in soap to  disperse water molecules and decrease surface tension

The point of the experiment: To make a bubble, you need soap added to water to make a thin film that can stretch around a puff of air : )