Hi Families,
All of our activities during the first week in March were inspired by the concept of wabi-sabi. Wabi-sabi is the Japanese feeling or concept of beauty in that which is ordinary or even imperfect. I stumbled upon a beautiful children's book of this title by Mark Reibstein and I knew that the concept of wabi-sabi was something our children could connect to and appreciate.
On Monday, we read Wabi-Sabi by Reibstein and discussed with the children how wabi-sabi may be present in their lives. Then we took a nature walk around the school and asked the students to gather items from nature that create this feeling of wabi-sabi. Back inside the classroom, we laid the items on the window ledge and each student talked about one item that brought forth this feeling of quiet and understated beauty in nature. I am fairly certain that the students have talked about wabi-sabi at home and that wabi-sabi will always be present in the mindset of these children. Their excitement at finding beauty in the simpler things such as a stick with peeling bark or an irregular shaped stone was quite heartwarming and their enthusiasm will stay with me for a lifetime!

On Monday we ended with a small project using coffee filters, coffee grounds, glue, brown paper bags and tempera paint to create small circular paintings that bring to mind the lines, shapes and textures one may find in nature. I wish I had photos of these to share with you, however maybe I can update with pictures later...
On Tuesday we used the ipads and viewed numerous Japanese rock gardens. We discussed the elements that are included in a rock garden and then asked the students to create their own small scale model, keeping the concept of wabi-sabi in mind. Using bark, small stones, sand, pea gravel and pine cones, the students were entirely involved in this process. The results are beautiful and I was so inspired by their work, that I created my own small display at home too : )
 |
| Hayden and Brody |
 |
| Leila |
 |
| Brody |
 |
| Dexter |
 |
| Dexter's completed rock garden! |
 |
| Hayden |
 |
| Joel |
 |
| Joel's completed rock garden |
 |
| Matthew's completed rock garden |
 |
| Matthew's rock garden, bird's eye view |
 |
| Porter |
 |
| Porter's rock garden, bird's eye view |
 |
| Sydney |
 |
| Sydney's rock garden, bird's eye iew |
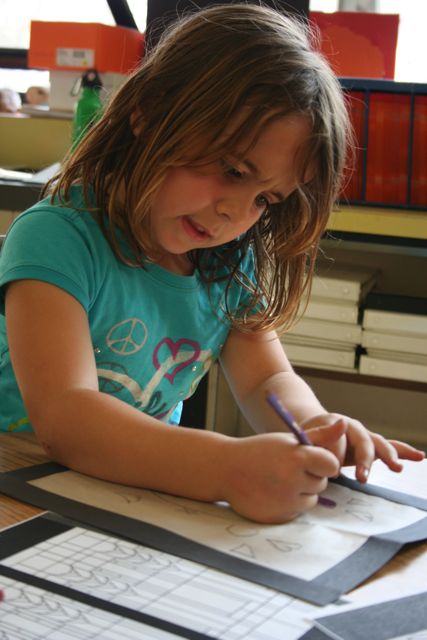
On Wednesday we created haikus (a method Reibstein used in his book to reveal the concept of wabi-sabi) and used a collage technique to illustrate them. Wabi-Sabi's illustrator, Ed Young, is a master of this technique, creating collages that have incredible textures and that echo the colors of nature.
There are 3 lines of verse in a haiku: the 1st verse contains 5 syllables, the 2nd verse contains 7 syllables and the 3rd verse contains 5. We practiced as a group by asking student volunteers to write verses with the appropriate number of syllables on the white board. Next, students drew images to further illustrate the haiku's meaning. Students were then ready to create their own illustrated haikus. The poems and artwork are terrific!
 |
| Emerson's haiku, preliminary class exercise |
 |
| Emerson |
 |
| Emily |
 |
| Aidan |
 |
| Mikel |
 |
| Suzanne |
 |
| Hugo |
 |
| Matthew |
 |
| Norah |
 |
| Liam |
 |
| Jessica |
 |
| Leila |
The following post is by Ms. Hata, who joined Beye Discovery in February. She is a wonderful and dedicated teacher who has added much to the program already! One of our students, after participating in Ms. Hata's tea ceremony, exclaimed that "this was the best day in Beye Discovery yet!" What a sincere testimonial and congratulations to Hata!
Hello Beye Discovery
Parents!
My name is Ms. Hata
and I recently joined the Beye Discovery family. I have had the pleasure of
meeting some of you already and hope to meet all of you soon! I have taught
kindergarten and first grade for five years with Chicago Public Schools. My
strengths are in elementary science education and working with students with
learning challenges. I sincerely look forward to working with all of the
children in Beye Discovery. I have already learned so much from them and have
been warmed by their individual personalities.
This week we have
been learning about wabi-sabi. It is the idea of finding zen and beauty in
simple objects or situations. Thursday was our day to experience wabi-sabi in a
Japanese tea ceremony. I explained to them some of the history and rituals of
the ceremony dressed in a kimono that Ms. Jocelyne had made in high school. Did
you know that kimono literally translates to "thing to wear"? We
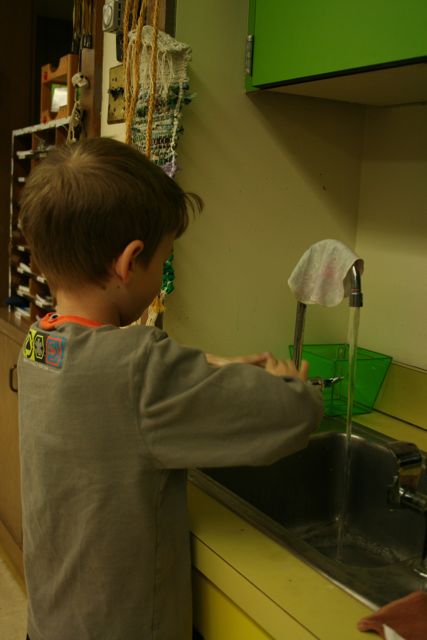
began by washing hands and taking a sip of water in order to show respect and
readiness for the ceremony. Students bowed and waited patiently as I explained
how to prepare the bowl for their Kashi (sticky snack) and then clean it in
anticipation for the tea. Many students truly savored the snacks and the green
tea that was prepared for them. I was so pleased to see that they understood
that the ceremony is about the simple rituals and “ichie go iche”, being in the moment. I could see the
wabi-sabi feeling on the children's faces as they turned their bowls
three times and drank three sips to begin their part of the ceremony. Three is
considered a lucky number in Japan and many things are done in threes. We
cleaned our areas and concluded our ceremony by watching a video of an
authentic tea ceremony and viewing pictures of tea farms in Asia. Please
ask your child what special ceremonies or rituals they can think of that are
performed at home. I bet there are quite a few!
Arigato!
 |
| Ms. Hata introducing vocabulary related to the tea ceremony |
|
 |
| Ms. Hata reviewing the vocabulary |
 |
| Ms. Hata's vocabulary words with translation |
|
 |
| washing of hands prior to the ceremony |
 |
| Liam distributing the napkins and bowls |
 |
| Ms. Hata distributing the kashi |
 |
| Max with kashi (sticky treat) |
 |
| Sydney with kashi |
 |
| Porter with kashi |
 |
| Brody |
 |
| Ms. Hata describing the importance of the towel to clean the tea cup |
 |
| Ms. Hata demonstrating how the towel is tucked under the kimono's sash after use |
 |
| Liam wiping his bowl in preparation for tea |
 |
| Ms. Hata serving tea |
 |
| Joseph and Hayden anticipating tea |
 |
| Hayden wiping his bowl |
 |
| Ms. Hata inviting students to enjoy their tea |
 |
| sipping tea |
 |
| Norah and Emily |
 |
| Ben |
 |
| Leila |
 |
| Hugo, Leila, Norah and Emily sipping tea |
 |
| Sydney and Max |
If you would like to see the traditional Japanese tea ceremony we viewed following our own ceremony, feel free to visit the link below:
http://www.youtube.com/watch?v=7tt7NBIVeMY&noredirect=1
On Friday, we veered from wabi-sabi a bit, but not from Japanese culture: We introduced a traditional Japanese fabric dying technique called shibori. A Western version of this technique is "tie dye". Shibori involves the binding, stitching, folding, twisting or compression of fabric to create a pattern when dye is applied. We created 2 natural dye baths by steeping blueberry tea and tumeric in hot water. Students then bound the 17 x 17" squares of fabric using rubber bands and also experimented with folding techniques.
In the next step, students submerged their fabric in the dye bath and waited while the natural dye worked it's magic. During this period of time, we set the stage for a really beautiful and smart way to "package" and transport items using squares of fabric. These package/carrying cloths are called furoshiki and are part of another Japanese tradition. When the Japanese give a gift, they use furoshiki (wrapping cloths), not paper, and give much attention to the presentation of the gift. It is ceremonial and shows the worth of the gift. In our wrapping demonstrations, Jocelyne showed students how to wrap and carry a soccer ball as well as how to wrap and carry 2 books.
 |
| adding the tea bags to the hot water |
 |
| blueberry tea, releasing its color |
 |
| tumeric dye bath |
 |
| A furoshiki example (soccer ball inside) |
 |
| back view, furoshiki with soccer ball |
 |
| stirring the dye bath with Ms. Nina |
 |
| Ben, Leila and Jessica ready to bind their fabric |
 |
| Daysha demonstrating to Max how to bind the fabric with rubber bands |
 |
| Joseph stirring the fabric and dye |
 |
| Leila, Jessica and Hugo stirring the dye |
 |
| checking the dye saturation |
 |
| the dye bath |
 |
| fabric bound with rubber bands, dyed with tumeric |
 |
| fabric bound with rubber bands, dyed with blueberry tea |
 |
| fabric folded, then bound with rubber bands |
 |
folding technique on left; bound with rubber bands on right
We're hooked on the shibori technique and making furoshikis! The super book that inspired this lesson is titled "Furoshiki, The art of wrapping with fabric" by Kumiko Nakayama-Geraerts. If you are eager to try this at home, we sent
some "how-to" hand-outs with instructions to tempt you even further : )
The furoshikis above will be on display at school during earth
month in April to encourage a more eco friendly alternative to plastic
bags when shopping. Be sure to check out the west wall by the office to view the display when we return from spring break!!!
|